The holidays are a time for warmth, togetherness, and, let's be honest, a fair bit of stress. Between decorating, gift shopping, and meal planning, finding time for homemade touches can feel impossible. But what if there was a secret weapon that delivered a truly impressive, utterly delicious, and genuinely gift-worthy treat in mere minutes? Enter the humble microwave. Forget everything you thought you knew about intricate candy making, because Easy Microwave Peanut Brittle: Homemade Perfection in Minutes is about to become your new holiday secret. It’s so simple, so quick, and so unbelievably good, your friends and family will be convinced you spent hours slaving over a hot stove.
The Unbelievable Secret: Gift-Worthy Brittle in Minutes
For generations, peanut brittle has been a cherished holiday tradition in countless homes. The crispy, caramelized crunch of sugar studded with savory peanuts evokes nostalgic memories and brings smiles to faces. Traditionally, however, making peanut brittle was an undertaking. It involved careful monitoring over a stovetop, precise temperatures, and often a second pair of hands to manage the molten sugar and quick pour. It was a labor of love, certainly, but a labor nonetheless.
From Skeptic to Convert: Embracing the Microwave Magic
Like many traditionalists, you might be raising an eyebrow at the thought of making candy, especially something as finicky as brittle, in a microwave. The sentiment is understandable. For years, the idea of microwave brittle was met with skepticism, often dismissed as a shortcut that couldn't possibly yield the same perfect results as the "old school" methods. But here's the game-changer: the microwave version not only lives up to, but often surpasses, expectations.
Imagine cutting the cooking time in half, or even more, with fewer pots to clean and less strenuous stirring. This modern approach to an age-old favorite allows you to achieve that perfectly crunchy, utterly delicious brittle without the traditional fuss. Many who have made the switch confess, almost guiltily, that they'll never go back to the stovetop method. The taste is identical, the texture impeccable, and the convenience unparalleled. Nobody will ever guess your exquisite microwave peanut brittle came together with such astonishing speed.
Why Microwave Brittle is Your Holiday Hero
The allure of homemade gifts lies in their thoughtfulness and unique charm. But time, as we've established, is often a luxury during the festive season. This is where microwave peanut brittle truly shines as your holiday hero. It's not just quick; it's genuinely gift-worthy.
- Impressive Presentation: Once cooled and broken into shards, homemade brittle looks artisanal and sophisticated. Package it in clear cellophane bags with festive ribbons, decorative tins, or small glass jars, and you have a beautiful, personal gift.
- Universal Appeal: Who doesn't love the sweet and salty crunch of peanut brittle? It's a crowd-pleaser that transcends age groups and tastes, making it a safe bet for any recipient.
- Cost-Effective: Making your own candy is often more economical than buying gourmet treats, allowing you to create multiple gifts without breaking the bank.
- Spreads Joy, Not Stress: The ease of the microwave method means less stress for you, allowing you to genuinely enjoy the process of creating something special for your loved ones.
Essential Tools & Ingredients for Microwave Peanut Brittle Success
While the microwave simplifies the cooking process, a few key tools and the right ingredients are still crucial for ensuring your microwave peanut brittle turns out perfectly every time. Precision, particularly with temperature, is the secret to moving from sticky goo to crisp, satisfying brittle.
The Power of Precision: Thermometers Are Your Friend
This is arguably the most vital piece of advice for any candy maker, microwave or otherwise. While some experienced cooks might "wing it," relying on visual cues, a thermometer is your steadfast guarantee for consistent results. You need the sugar mixture to reach the "hard crack stage," which is typically between 300°F and 310°F (149°C - 154°C).
- Why it's essential: Cooking below this temperature range will result in a sticky, chewy, more caramel-like texture rather than the desired crisp brittle. Overcooking can lead to burnt sugar, a bitter taste, and a very dark brittle.
- Candy Thermometer vs. Instant-Read: While a traditional candy thermometer works, many modern cooks prefer an instant-read thermometer. These are often more versatile for other kitchen tasks and can accurately measure the high temperatures needed for candy making. It's a worthwhile investment for any home cook.
Gathering Your Simple Supplies
One of the beauties of microwave peanut brittle is its short, accessible ingredient list. You likely have most of these staples in your pantry already:
- Granulated Sugar: The base of our brittle, providing the essential sweetness and structure.
- Light Corn Syrup: This isn't just for sweetness; it plays a critical role in preventing sugar crystallization, ensuring a smooth, clear brittle.
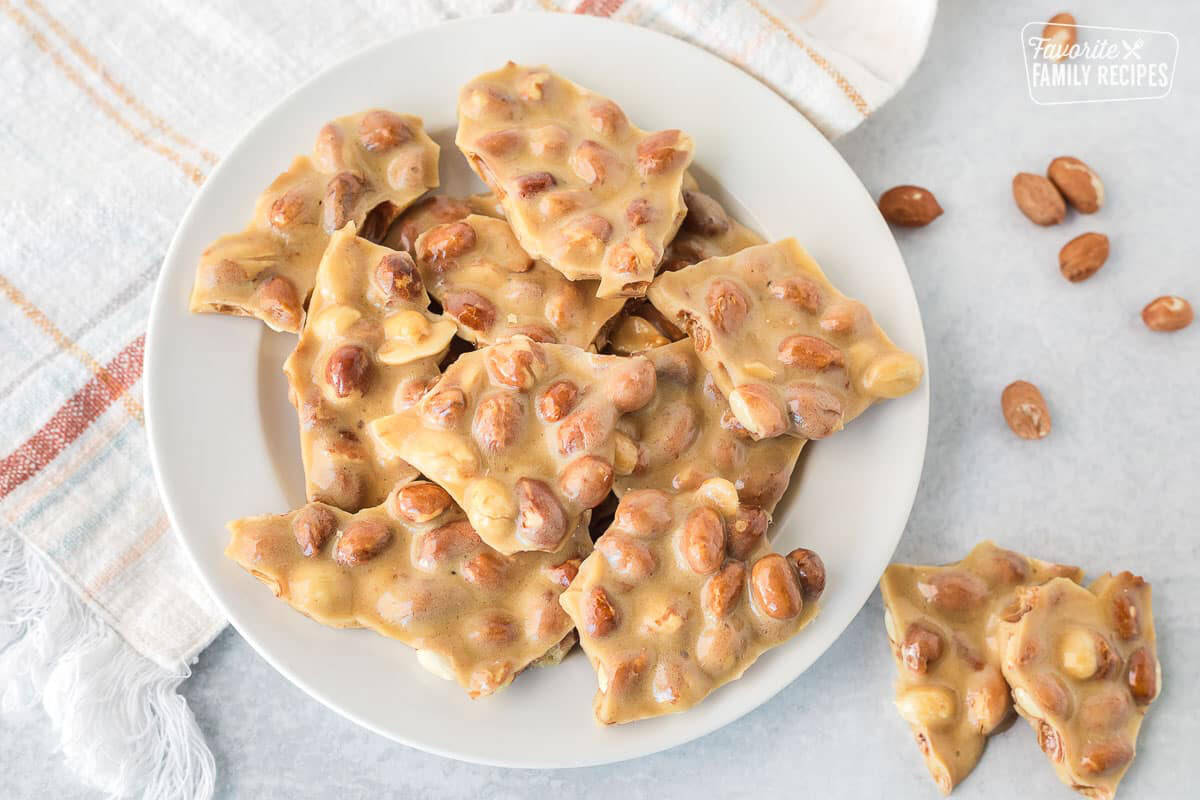
- Unsalted Peanuts: The star of the show! Use raw or dry-roasted unsalted peanuts. If using salted, adjust or omit any added salt in the recipe.
- Butter: Adds richness, flavor, and helps prevent sticking.
- Baking Soda: A crucial ingredient that provides the characteristic light, airy, and porous texture of brittle. When added to the hot sugar mixture, it reacts to create tiny air bubbles, making the brittle easy to bite and wonderfully crisp.
- Vanilla Extract: (Optional, but recommended) Enhances the overall flavor profile.
Beyond ingredients, ensure you have a very large, microwave-safe bowl (the mixture will bubble up significantly), a sturdy spoon for stirring, and a greased baking sheet or silicone mat for cooling the brittle.
Mastering the Art of Microwave Peanut Brittle: Tips for Perfection
While the microwave simplifies things greatly, there are still a few nuances that can elevate your brittle from good to absolutely phenomenal. Understanding these factors will help you consistently achieve that perfect, crunchy texture.
The Humidity Factor: Battling the Sticky Truth
Humidity is the nemesis of candy makers, especially when it comes to brittle. Sugar is hygroscopic, meaning it readily absorbs moisture from the air. High humidity can lead to a brittle that is soft, sticky, and chewy, rather than hard and crisp.
- Choose Your Day Wisely: If possible, try to make brittle on a dry, low-humidity day.
- Adjust Temperature: On humid days, you might need to cook your brittle a few degrees higher than the recommended 300-310°F to compensate for the extra moisture.
- Immediate Storage: Once your brittle is completely cooled and broken, store it immediately in an airtight container at room temperature. Do not refrigerate, as this can introduce moisture and cause stickiness.
Wattage Wisdom: Understanding Your Microwave
Not all microwaves are created equal. The wattage of your microwave will significantly impact cooking times. A higher wattage microwave (e.g., 1200-1600 watts) will cook faster than a lower wattage one.
- Don't Rely Solely on Time: Recipe times are a guideline. Your thermometer is your ultimate guide. The final stage, after adding peanuts and butter, is particularly sensitive to wattage variations.
- Monitor Closely: Especially during the last few minutes of cooking, watch your mixture and the thermometer carefully. It can go from perfect to burnt very quickly.
Safety First: Working with Hot Sugar
Let's be clear: molten sugar is extremely hot and can cause severe burns. While the microwave method reduces some of the risks associated with stovetop cooking, caution is still paramount. Being prepared and mindful is key to a safe and enjoyable brittle-making experience. For more detailed safety precautions and expert advice, be sure to check out Master Microwave Peanut Brittle: Pro Tips for Perfect Crunch.
- Clear Workspace: Ensure your counter is clear and clean before you begin. Have all ingredients measured and ready to go.
- Microwave-Safe Gear: Use a bowl explicitly labeled "microwave safe." Glass or ceramic bowls are usually good choices.
- Protect Your Hands: Always use oven mitts or thick kitchen towels when handling the hot bowl.
- Exercise Extreme Caution: Never taste the hot sugar mixture. Keep children and pets away from the cooking area.
- Have a Plan: Know exactly where you will pour the hot brittle mixture (on a greased baking sheet or silicone mat) *before* you start cooking.
Beyond the Basics: Elevating Your Brittle Game
Once you've mastered the basic microwave peanut brittle, you might find yourself wanting to experiment or present it in even more creative ways.
Creative Gifting Ideas for Your Homemade Treat
Transforming your quick brittle into a truly memorable gift is simple with a little creativity:
- Themed Tins: Use holiday-themed tins for Christmas, heart-shaped boxes for Valentine's Day, or rustic clear jars for any occasion.
- Custom Labels: Design and print small labels with "Handmade with Love," your name, and the type of brittle.
- Ribbons and Tags: A simple ribbon and a handwritten tag can elevate the presentation significantly.
- Gift Baskets: Combine your brittle with other homemade treats, gourmet coffee, or a cozy mug for a delightful gift basket.
- Hostess Gifts: A small, beautifully packaged bag of brittle is a perfect thank-you for dinner party hosts.
Troubleshooting Common Brittle Blunders
Even with the best intentions, things can sometimes go awry. Here’s how to diagnose and fix common brittle problems:
- Sticky/Chewy Brittle: This is almost always due to undercooking. The sugar didn't reach the hard crack stage (300-310°F). Humidity can also contribute. Ensure you're using a thermometer and cooking to the correct temperature.
- Burned Brittle: The mixture was cooked too long or at too high a power setting for your microwave. It can also happen if the sugar mixture isn't stirred adequately during cooking, leading to hot spots. Monitor closely and stir well.
- Hard to Break/Too Thick: This usually means it was spread too thick on the baking sheet. Try to spread it thinner next time. Alternatively, it might have been slightly overcooked.
- Not Spreading Evenly: The mixture cooled too much before you could spread it, or you didn't work quickly enough. Ensure your surface is ready and pour/spread immediately after adding the baking soda.
Armed with these tips, you're not just making candy; you're crafting delicious, impressive, and thoughtful gifts that will delight everyone on your list. The magic of microwave peanut brittle lies in its ability to combine speed and simplicity with truly spectacular results, proving that homemade doesn't have to mean time-consuming.
The journey from a skeptical observer to a microwave brittle enthusiast is a common one, and for good reason. This ingenious method liberates you from the lengthy, often demanding process of traditional candy making, without sacrificing an ounce of flavor or texture. This holiday season, embrace the quick, easy, and incredibly delicious world of microwave peanut brittle. It’s more than just a sweet treat; it’s your secret weapon for spreading joy, creating cherished memories, and gifting homemade perfection with unparalleled ease. So, grab your ingredients, fire up that microwave, and prepare to amaze everyone with your culinary prowess!
